
Beach Sun Shelter Setup: The 60-Second Aussie Beach Walkthrough
Master the 60-second beach sun shelter setup with our step-by-step inflate, position, and ballast routine for effortless, wind-resistant Australian coastal…
Published 2026-11-01T20:01:32.992+00:00
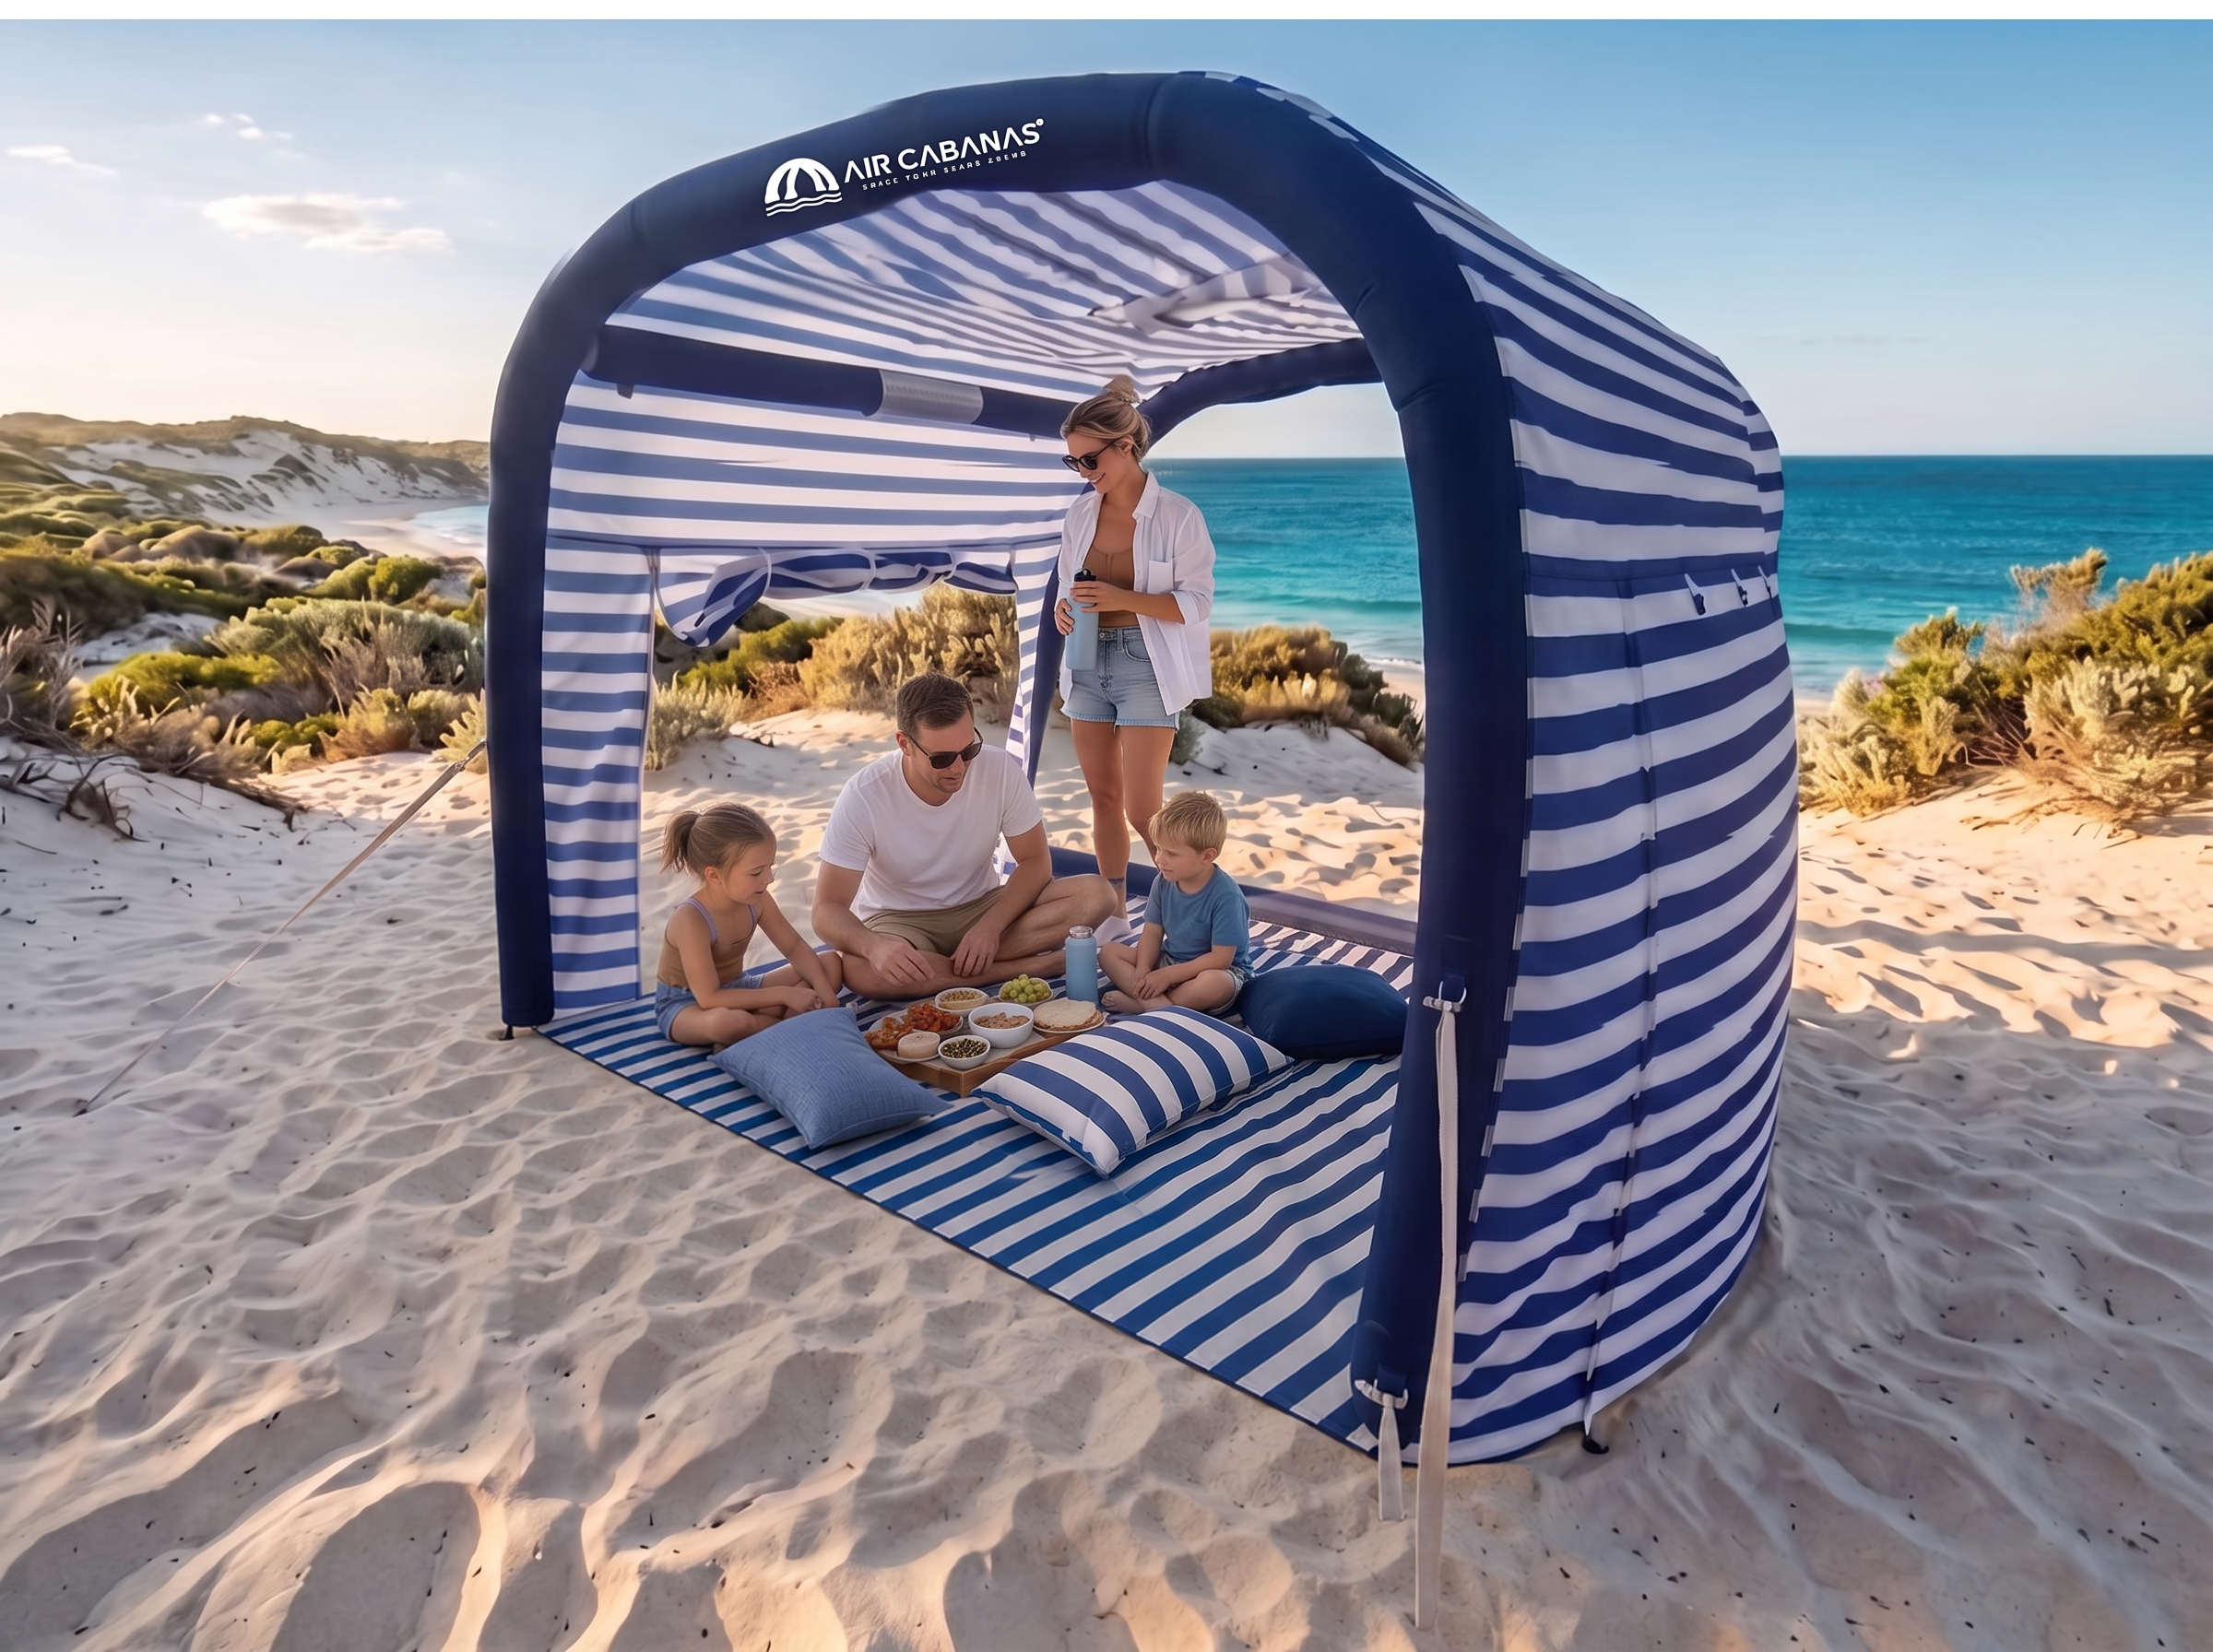
Every Australian beach lover knows the familiar sting of wrestling with flimsy shade frames while afternoon onshore gusts sweep across the coast. Finding a high-performance beach sun shelter that sets up in seconds without bending poles, tangled cords, or rising frustration has transformed family days on the sand from a chore into sheer relaxation. Modern inflatable shade technology combines structural rigidity with lightweight portability, letting you pitch a stable, breezy ocean sanctuary in under a minute. Here is your definitive walkthrough on mastering the inflate, position, and ballast routine on Australian sand.
The anatomy of an effortless beach setup
Arriving at the coastline on a warm Australian summer morning should bring immediate relaxation, yet the initial ten minutes on the sand often feel like an exercise in frustration. Traditional beach shades have long relied on rigid frames, complex joint hubs, and spidery aluminium arms that resist alignment whenever a coastal onshore breeze picks up. Wrestling metal poles while family members stand around waiting in the beating sun is a ritual most beachgoers would eagerly leave behind. Modern outdoor shelter engineering has completely shifted this dynamic by rethinking structural support from the ground up, moving away from fragile metal toward pressurized air beams.
A high-performance inflatable shade structure strips away mechanical friction by substituting rigid aluminium ribs with welded thermoplastic polyurethane tubes wrapped in durable, high-density fabric sleeves. When you unpack an air-tube shelter, there are no loose components to drop into the dry sand, no shock cords to tangle, and no sharp pin-release buttons that pinch sun-creamed fingers. The entire canopy fabric and inflatable framework form a cohesive, single-piece unit that lays completely flat on your chosen patch of sand. This integrated design philosophy not only reduces the packed carry weight but also eliminates the single points of mechanical failure that commonly bend, warp, or snap during an unexpected coastal gust.
Understanding the basic mechanics of your beach sun shelter setup allows you to move with quiet confidence and speed across any beach in Australia, from the packed flats of Noosa Main Beach to the exposed golden sweeps of Cottesloe. Instead of battling tensioned metal poles that act as sails before they are anchored, an inflatable air system stays low and pliable on the sand until you actively choose to introduce pressure. By mastering a straightforward, step-by-step inflate, position and ballast routine, you transform what used to be a stressful two-person chore into a rapid, smooth process that takes barely a minute of light physical activity.
Why rigid frames struggle on the shoreline
Metal-framed shades require tension to maintain structural integrity, which makes them inherently vulnerable during the transitional setup phase. Before every leg is locked and every pocket filled, a sudden gust of wind catches the loose overhead canopy, twisting aluminium hinges and turning rigid crossbars into dangerous leverage points. If an arm snaps or bends, the entire shade is rendered useless for the rest of your holiday.
In contrast, air-beam architecture absorbs lateral energy naturally. Without brittle joints or rigid struts to shear under sudden stress, the inflatable framework flexes under pressure before springing directly back to its engineered profile. This makes setting up solo not only feasible, but remarkably relaxed, even when the afternoon sea breeze has already kicked in across the sandspit.
Site selection: Reading the sand and the wind
A successful 60-second beach sun shelter setup begins before you even unclip the carry bag straps. Choosing the right piece of coastal real estate dictates how your shade behaves throughout the entire day. Start by glancing toward the surf line and reading the prevailing breeze. Look at the beach flags, inspect the drift of sea spray off breaking waves, or simply turn your face into the airflow. You want to establish where the wind is coming from relative to where the sun will travel across the sky during your stay. Positioning your shelter with its closed spine or low-profile rear wall facing into the oncoming breeze significantly reduces internal aerodynamic lift.
Surface terrain on Australian beaches varies dramatically, often within a single twenty-metre stretch of shoreline. Avoid laying down your shelter on dry, loose dune crests where foot traffic has pulverized the quartz sand into powdery dust that offers minimal anchoring resistance. Instead, target firm, level sand just above the high-tide watermark. Look for the distinct tide line marked by dry seaweed or sea foam debris, and position your shelter safely landward of this zone to ensure an incoming tide does not flood your beach towels and undermine your corner ballast points two hours into your session.
Spacing relative to fellow beach lovers is another crucial consideration for safe coastal recreation. Always provide generous clearance between your shelter and neighbouring groups, lifeguards on duty, and designated coastal access paths. Remember that the sun’s angle shifts steadily from east to west, casting an evolving shadow footprint throughout your stay. By anticipating this natural sun arc during initial site selection, you can angle the open front of your shelter to enjoy sweeping panoramic ocean views while ensuring your interior living space remains protected within deep, cool UV shade throughout peak midday heat.
The step-by-step inflate, position and ballast routine
Executing a fast, stress-free shelter installation requires a systematic approach. Lay your carry bag flat on the sand, unzip the main compartment, and unfold the canopy completely. Before reaching for the pump, make sure the four corner fabric legs are spread naturally to form a neat rectangle on the sand, ensuring the overhead canopy is free from twists. If a moderate sea breeze is already blowing across the foreshore, anchor your upwind corner first by half-filling one sand ballast pocket. This simple preliminary step guarantees the uninflated fabric will not flap erratically or migrate down the beach while you prepare the pump chamber.
Next, attach the high-volume, double-action manual hand pump nozzle securely into the single-point inflation valve. Because the pump forces air into the internal TPU bladder on both the downward push and upward pull strokes, pressure builds with surprising speed. Within roughly ten to fifteen strokes, the air tubes expand, lifting the central canopy ceiling upward into a taut, rigid dome structure. Modern air systems like the AirCabana feature high-capacity dual valves that seal instantly when you detach the hose, ensuring no valuable air volume escapes before you secure the protective screw cap.
Once the structure stands upright, finalize your position and finish your ballast routine. Rotate the shelter slightly if needed so the open front frames your ocean view while shielding the interior from crosswinds. Move systematically around the four perimeter corners, opening each wide-mouth sand pocket and shovelling damp sand deep inside until every corner forms a dense, low-slung weight bag. For total coastal stability, always pack damp sand rather than fine, dry surface dust, as damp coastal sand delivers almost double the physical mass per scoop, locking your shelter firmly to the beach.
Optimizing corner ballast weight
The secret to rock-solid stability in coastal conditions lies entirely in how you manage your ballast pockets. Always dig two or three inches beneath the surface layer of powder to unearth cool, damp sand, which packs tightly and creates an immovable anchor base. Ensure the sand pockets are filled completely to the brim, allowing the weighted base to anchor the air tubes firmly to the earth.
In gusty or open beach conditions, you can also use the integrated guy-line points and sand stakes to create outward diagonal tension. Extending the lines outward at a 45-degree angle from each air-tube leg increases the shelter's resistance to shifting, providing an ultra-secure family headquarters that stays planted while you take a refreshing dip in the ocean.
Mastering your beach sun shelter in coastal conditions
Even with an expertly designed shelter, safety along the Australian coast demands continuous mindfulness and active environmental awareness. Sudden southerly busters in New South Wales, sudden afternoon squalls across Port Phillip Bay, or shifting westerly heat waves on the Western Australian coast can alter conditions in a matter of minutes. No lightweight shade product is ever entirely wind-proof, and believing that any personal cabana can withstand gale-force squalls is a dangerous misconception. Responsible beachgoers always maintain visual supervision over their setup, keeping an eye out for unpredictable shifts in wind velocity.
If you notice the wind rapidly shifting direction or strengthening into an aggressive, sustained onshore gale, proactively check your corner ballast pockets. Over several hours, wind vibration can cause dry sand to settle or shift inside ballast bags. Topping them up with fresh scoops of dense, damp sand restores optimal holding friction. Furthermore, inspecting your anchor pegs and ensuring your guy-lines maintain crisp tension ensures the shelter's aerodynamic profile remains taut, preventing air-tube buffeting and reducing stress across the UV-treated canopy seams.
Knowing when to pack down is the true hallmark of an experienced Australian beach lover. If beach umbrellas around you begin inverting, lifeguard towers issue wind warnings, or gusts reach a level where loose sand is being lifted and blown horizontally across your ankles, it is time to drop the structure. Because an inflatable beach sun shelter relies on air pressure rather than fixed metal joints, deflation is instant. Uncapping the rapid-release valve drops the structure completely flat to the sand in less than three seconds, instantly removing any surface area for the wind to catch.
Why air tubes outperform pole-frame cabanas on the sand
For years, Australian families carted heavy metal pole-frame cabanas down long flights of timber beach stairs, putting up with sore shoulders and bruised knuckles. While those classic square shades became a familiar sight across coastal holiday spots, their reliance on a heavy central steel pole and multiple extending scissor-struts has always presented inherent usability drawbacks. The central pole requires deep, forceful boring into compacted sand, demanding physical muscle that many family members find exhausting. If the centre pole is not drilled deep enough, a single sharp gust can lever the entire metal contraption out of the ground.
The emergence of the air cabana category has revolutionized how Australians view day shelters by removing metal entirely from the overhead living space. Without a central pole splitting your towel layout in half, you gain completely unrestricted 360-degree usable floor space beneath the UV canopy. Children can play board games, babies can take midday naps, and adults can stretch out across extra-wide beach towels without bumping their knees against an abrasive steel mast. Furthermore, the absence of rigid metal parts makes carrying your gear from the car boot to the water's edge a genuinely lightweight, single-bag endeavour.
Durability over multiple summer seasons is another area where modern inflatable architecture shines brightly. Traditional pole-frame cabanas inevitably suffer from salt spray ingress, which oxidizes aluminium joints, jams spring-loaded ball detents, and coats steel cross-members in fine rust. Inflatable systems have zero moving mechanical metal parts. Saltwater, coarse sand, and tropical humidity simply cannot corrode an engineered fabric air bladder. Giving your AirCabana a quick rinse with clean fresh water from the garden hose after your beach trip ensures the materials remain pristine and ready for the next sunny adventure.
The 60-second packdown: Speed without the struggle
When the sun begins to set over the headland and the kids are salt-crusted, tired, and ready for an afternoon ice cream, nobody wants to spend twenty minutes fighting with stuck metal buttons, jamming hinges, or forcing bent poles back into undersized zippered sleeves. The packdown routine of an air-beam beach sun shelter is engineered to be every bit as swift and satisfying as its initial morning inflation. In fact, deflating and rolling away your shelter is often completed before traditional beachgoers have even finished unhooking their first canopy arm.
Begin the packdown sequence by cleanly emptying the corner ballast pockets. Rather than trying to lift heavy sand out with your hands, simply roll the corner pocket outwards to dump the damp sand cleanly back onto the foreshore. Give each corner leg a gentle shake to dislodge any clinging quartz grains from the fabric exterior. Once the pockets are completely clear of sand, open the primary wide-mouth deflation valve on the main air beam. With a sudden hiss, the contained air evacuates rapidly, and the structure sinks gently and flatly directly onto the beach.
To pack your shelter neatly into its dedicated travel bag, fold the side legs inward toward the centre of the canopy to create a clean, uniform rectangle of fabric. Starting from the leg ends furthest away from the open valve, roll the shelter tightly toward the valve point. This rolling action naturally pushes any remaining residual air pockets cleanly out through the open exhaust port. Slip the supplied compression strap around the rolled fabric bundle, slide it effortlessly into the oversized carry bag, zip it shut, and you are ready to head home with minimal fuss.
Frequently asked questions
How does a beach sun shelter stay up in the wind?
A beach sun shelter relies on a combination of aerodynamic profile design and physical ballast. High-capacity corner pockets are filled with heavy, damp sand to anchor the base directly to the ground, while high-tensile air tubes or flexible frames absorb wind gusts without buckling. Proper setup requires pointing the low-profile closed side into the wind and using guy lines in breezy conditions.
Can one person put up a beach sun shelter alone?
Yes, an inflatable beach sun shelter is specifically designed for quick, effortless solo setup. Because there are no awkward metal scissor-arms or rigid poles to hold simultaneously, one person simply unrolls the canopy, pumps up the single-valve air frame in seconds, and fills the corner sand pockets to lock the entire structure in place without any assistance.
How long does it take to inflate an air cabana?
Inflating a quality air cabana like the AirCabana takes roughly 20 to 30 seconds of easy pumping using a standard double-action hand pump. The high-volume airflow expands the structural air beams in just a dozen strokes, popping the overhead UV canopy completely upright without requiring strenuous physical effort or mechanical assembly.
What is the best way to secure a shelter in loose sand?
The most effective method is to dig past the powdery surface layer to collect damp, compacted sand for your corner ballast pockets. Damp sand provides substantially more weight per scoop than dry sand. For added security during gusty afternoons, extend external guy lines outward and bury your sand pegs horizontally in deep trenches.
Should I pack down my beach sun shelter if wind picks up?
Yes, you should always pack down your shelter if coastal wind gusts become severe or unsafe. While air tubes naturally flex and do not bend like metal frames, no lightweight beach canopy is designed to withstand violent squalls or gale-force winds. Uncapping the rapid-deflate valve drops the shade safely in seconds.